Convex MCP Visual

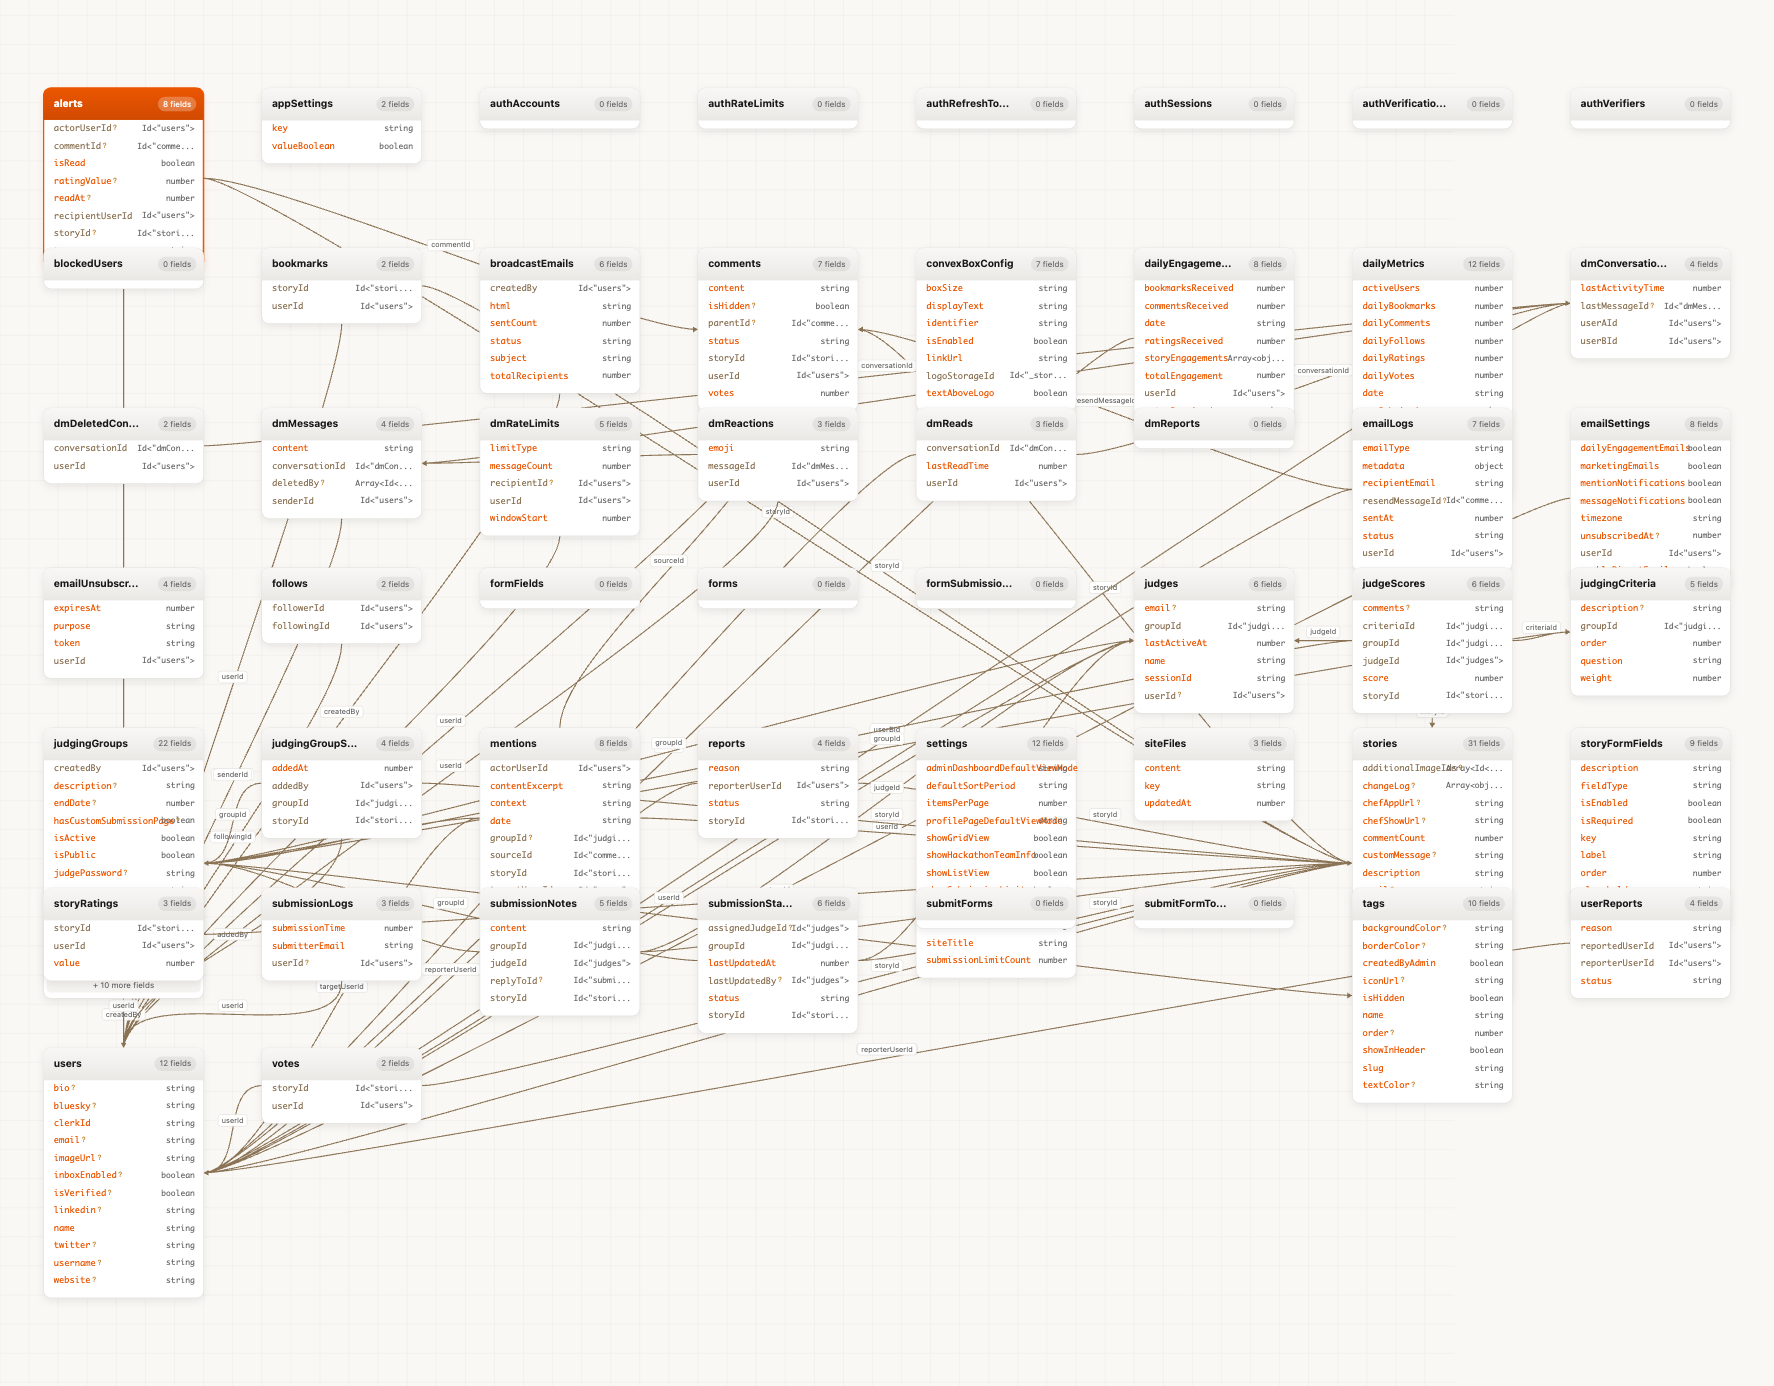
Schema visualizer and dashboard tools for exploring Convex databases. Opens interactive browser UIs alongside terminal output.
Features:
- Schema browser with graph view, list view, and document browser
- Component browser for viewing installed Convex components
- Real-time dashboard with metrics and charts
- Mermaid ER diagrams with relationship detection
- Codebase subway map for files and imports
- Table heatmap for recent writes
- Schema drift view for declared vs inferred fields
- Write conflict report from logs
- Dark mode support
- Multi deployment support
Three ways to use:
| Method | Use case |
|---|
| Direct CLI | Run from any terminal without MCP |
| MCP Server | Claude Code, Claude Desktop, Cursor, Codex |
| Claude Plugin | Install from Claude Code marketplace |
Convex References:
Quick Start
Option A: Direct CLI (any terminal):
# Install globally
npm install -g convex-mcp-visual

# Setup deploy key
convex-mcp-visual --setup

# Use it
convex-mcp-visual schema      # Browse schema
convex-mcp-visual components  # Browse installed components
convex-mcp-visual dashboard   # View metrics
convex-mcp-visual diagram     # Generate ER diagram
convex-mcp-visual subway      # Codebase subway map
convex-mcp-visual table-heatmap # Table writes heatmap
convex-mcp-visual schema-drift  # Declared vs inferred schema
convex-mcp-visual kanban      # Kanban board of jobs/agents
convex-mcp-visual write-conflicts --log-file logs.txt
Option B: MCP Server (Claude/Cursor/OpenCode/Codex)
# Auto-install to all MCP clients (Cursor, OpenCode, Claude Desktop, Codex)
npx convex-mcp-visual --install

# Or install to specific clients
npx convex-mcp-visual --install-cursor
npx convex-mcp-visual --install-opencode
npx convex-mcp-visual --install-claude
npx convex-mcp-visual --install-codex

# Claude Code CLI (alternative)
claude mcp add convex-visual -- npx convex-mcp-visual --stdio

# Codex CLI (alternative)
codex mcp add convex-visual -- npx convex-mcp-visual --stdio

# Setup deploy key
npx convex-mcp-visual --setup
Option C: Claude Code Plugin
# Add the marketplace
/plugin marketplace add waynesutton/convex-mcp-visual

# Install the plugin
/plugin install convex-visual@convex-visual-marketplace
See Claude plugin docs for details on plugin structure.
2. Setup Deploy Key
Run setup from your Convex project folder:
cd my-convex-app/
npx convex-mcp-visual --setup
The setup wizard detects your project from .env.local and saves the deploy key per-project. Just copy and paste the key from the Convex dashboard.
Do not add export CONVEX_DEPLOY_KEY=... to your shell profile (~/.zshrc,
~/.bashrc, etc.). A global export overrides all per-project .env.local files and
connects every project to the same deployment. If you already did this, see
Troubleshooting for removal steps.
Get your deploy key from dashboard.convex.dev under Settings > Deploy Keys.
Multiple Convex Apps
One-time setup for each project:
cd my-app-1/
npx convex-mcp-visual --setup
# Paste your deploy key when prompted, it saves to .env.local
Switching between apps: Just cd to the project folder. The MCP server reads from that folder's .env.local automatically.
cd my-app-1/   # Now using my-app-1's Convex deployment
cd ../my-app-2/ # Now using my-app-2's Convex deployment
No need to run --setup again after the initial setup.
See Convex Deploy Keys for more details.
3. Test Connection
npx convex-mcp-visual --test
4. Use It
MCP Commands for Claude:
'%20stop-opacity%3D'0.16'%2F%3E%3Cstop%20offset%3D'1'%20stop-color%3D'rgb(200%2C90%2C60)'%20stop-opacity%3D'0.03'%2F%3E%3C%2FlinearGradient%3E%3C%2Fdefs%3E%3Crect%20width%3D'320'%20height%3D'200'%20fill%3D'url(%23g)'%2F%3E%3Ccircle%20cx%3D'250'%20cy%3D'56'%20r%3D'92'%20fill%3D'rgb(200%2C90%2C60)'%20fill-opacity%3D'0.06'%2F%3E%3Ccircle%20cx%3D'64'%20cy%3D'172'%20r%3D'58'%20fill%3D'rgb(200%2C90%2C60)'%20fill-opacity%3D'0.05'%2F%3E%3C%2Fsvg%3E)